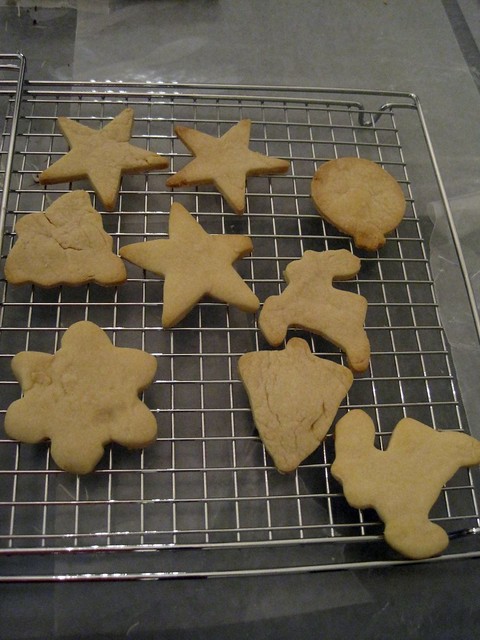
Friday, December 24, 2010

these are a few of my favorite things

2010 was an awesome year. We traveled so much, to places I had only dreamed about & to places I once called home. Below are some of my favorite images of the year. We are off to Barbados tomorrow, to spend Christmas with my family.

Thank you, dear blog readers, for making 2010 one of the best year's yet. Merry Christmas, Happy Hanukkah, Happy New Year & Happy Festivus!

See you on the flip side!

Boats in St. Lawrence Gap
Barbados
February 2010


Photo (c) Christina Saull - All Rights Reserved

Paris
Las Vegas, Nevada
April 2010


Photo (c) Christina Saull - All Rights Reserved

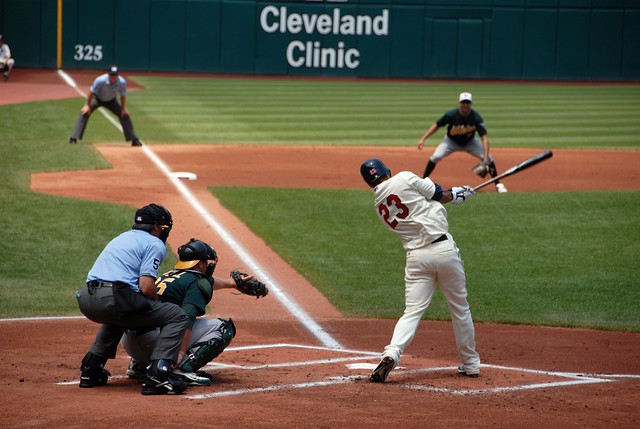
Indians hit
Cleveland, Ohio

July 2010

Photo (c) Christina Saull - All Rights Reserved

A beautiful summer afternoon
Hudson, Ohio
July 2010


Brooklyn Bridge
over the Hudson River, between Manhattan & Brooklyn
July 2010


Photo (c) Christina Saull - All Rights Reserved

Stacked kayaks
Kennebunkport, Maine
August 2010


Photo (c) Christina Saull - All Rights Reserved

Rocky Coast
Kennebunk, Maine
August 2010


Photo (c) Christina Saull - All Rights Reserved

Portland Head Lighthouse
Portland, Maine
August 2010


Photo (c) Christina Saull - All Rights Reserved

Ocean Kayaking
Bar Harbor, Maine
August 2010


Photo (c) Christina Saull - All Rights Reserved

Peggy's Cove Afternoon

Peggy's Cove, Nova Scotia, Canada
August 2010


Photo (c) Christina Saull - All Rights Reserved

Thursday, December 23, 2010

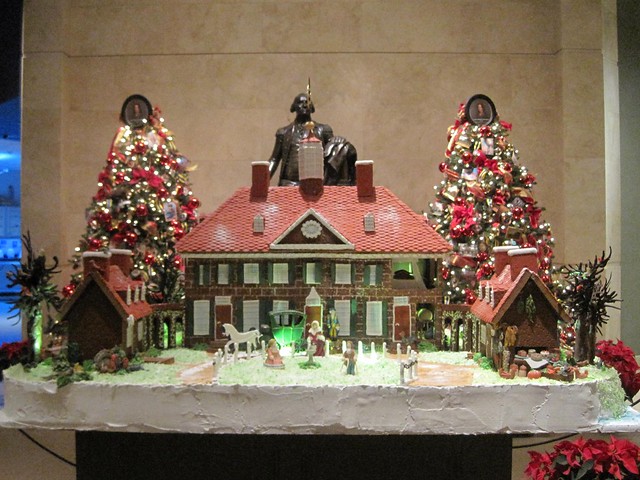
Christmas at Mt. Vernon


Photo (c) Christina Saull - All Rights Reserved

A little background:
Mount Vernon was home to George Washington for more than 45 years. First known as Little Hunting creek Plantation, the estate was originally granted to Washington's great grandfather, John Washington, in 1674. George Washington inherited the property upon the death of his brother Lawrence in 1761.

Over the years, Washington enlarged the residence & built up the property from 2,000 to nearly 8,000 acres. He divided the acreage into five working farms, including the Mansion House Farm, where he lives with his family. One of the biggest improvements he made to the mansion was the addition of the two-story porch, or piazza, overlooking the Potomac River.

The mansion has been restored to its appearance in 1799, the last year of Washington's life.

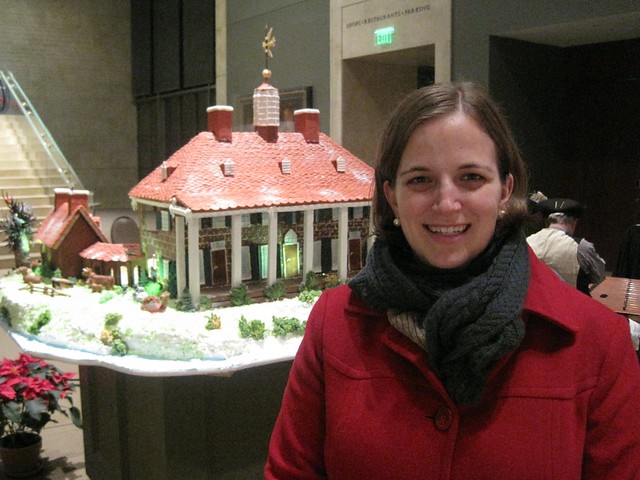
We toured Mt. Vernon (for my first time ever) a few weeks ago on a rainy Saturday evening. A special Christmas at Mt. Vernon program is held every December, with guided tours of the mansion, included historical characters inside. Normally I find "historical character" actors a bit cheesy, but when Martha Washington complimented me on my red coat & told me it reminded her of her cape at Valley Forge, I was smitten. The mansion is huge & gorgeous inside, but smaller than expected on the outside. The view out to the Potomac is spectacular & land has been purchased on the opposite side of the river to preserve the view, so it will always be just as George Washington saw it.

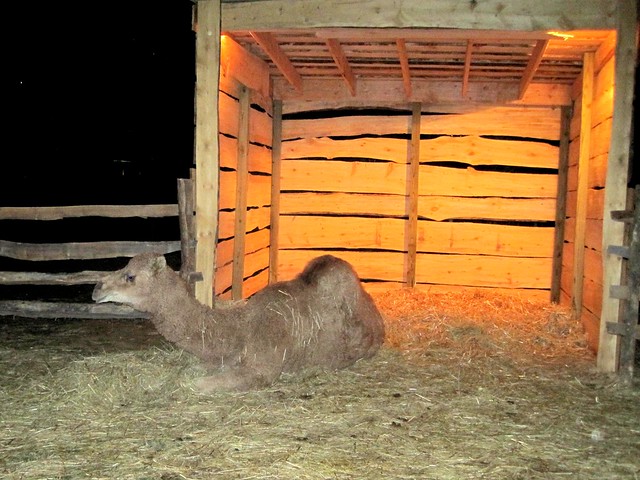
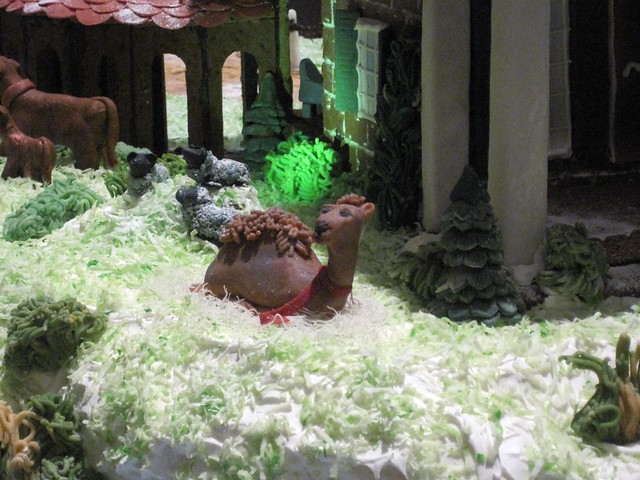
As part of the special "Mt. Vernon by Candlelight at Christmas" program, they handed out gingerbread cookies & hot cider, had period musicians & even a camel, just like the one Washington bought to entertain his guests!

It was a great experience & I hope to return to Mt. Vernon during the day, in order to be able to fully appreciate the estate. Now, if you'll excuse me, I feel the need to re-read David McCullough's 1776 for the 100th time.

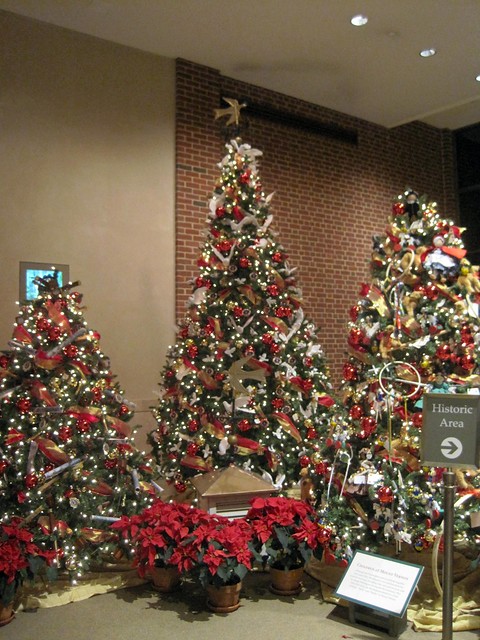
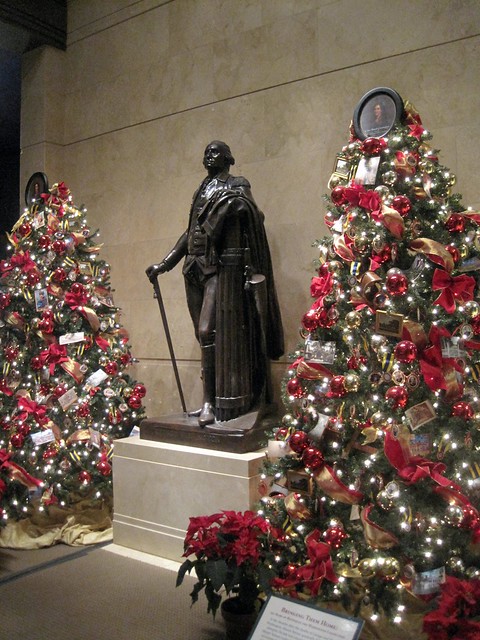
pretty decorations greeting visitor's en-route to the mansion in the newly finished visitor's center

Photo (c) Christina Saull - All Rights Reserved

musicians playing period instruments & holiday songs

Photo (c) Christina Saull - All Rights Reserved

Christmas camel!

Photo (c) Christina Saull - All Rights Reserved

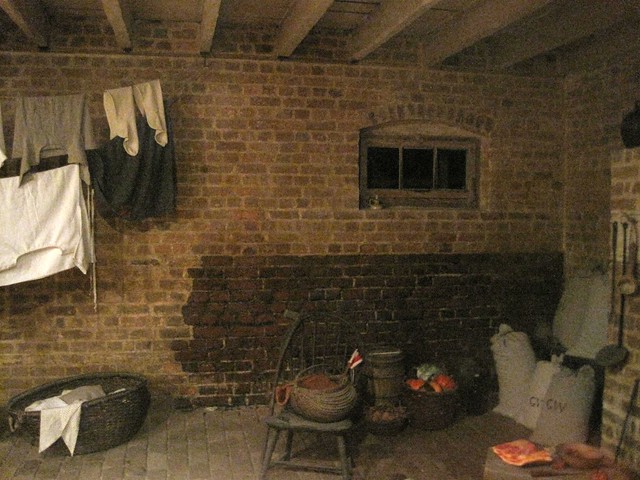
slave quarters - the dark bricks in the right hand corner are original to the structure from the 1790's

Photo (c) Christina Saull - All Rights Reserved

a nice warm fire in a kettle

Photo (c) Christina Saull - All Rights Reserved

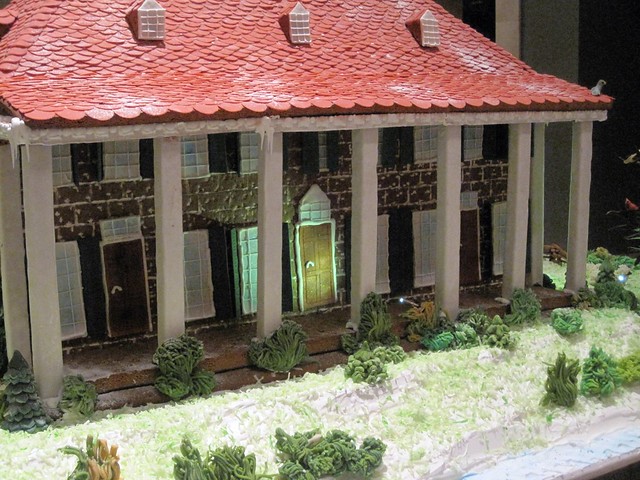
gingerbread house Mt. Vernon, created by the former White House Pastry chef

Photo (c) Christina Saull - All Rights Reserved

gingerbread portico

Photo (c) Christina Saull - All Rights Reserved

sugar Christmas camel!

Photo (c) Christina Saull - All Rights Reserved


Photo (c) Christina Saull - All Rights Reserved

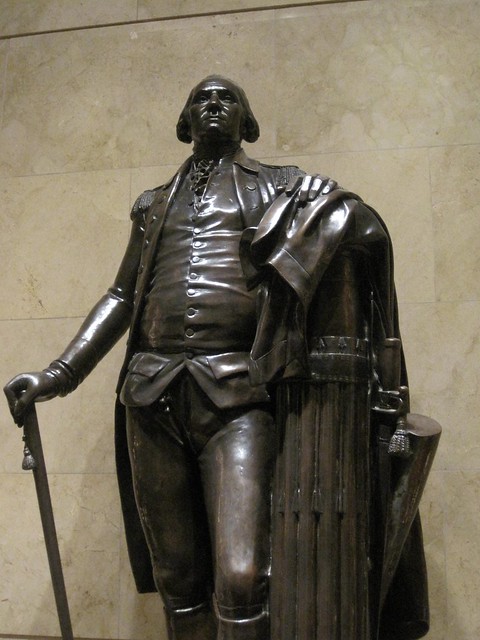
George!

Photo (c) Christina Saull - All Rights Reserved

holiday George

Photo (c) Christina Saull - All Rights Reserved

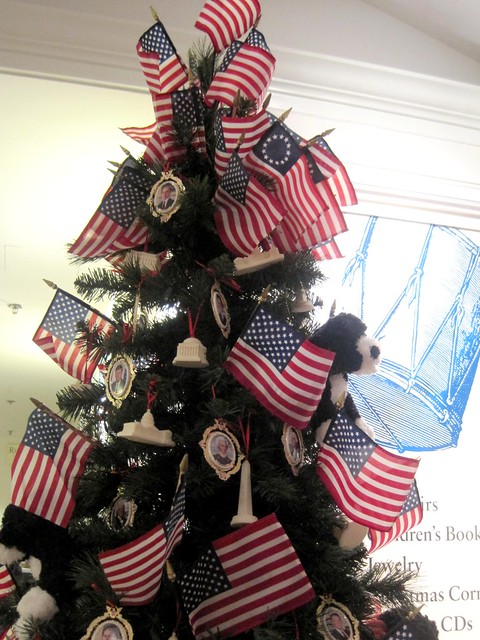
patriotic tree

Photo (c) Christina Saull - All Rights Reserved

Saturday, December 18, 2010

Holiday Treats-a-palooza: Wrap Up

I would call the First Annual Holiday Treats-a-palooza a success, wouldn't you? Lets review what we made this week:


Photo (c) Christina Saull - All Rights Reserved
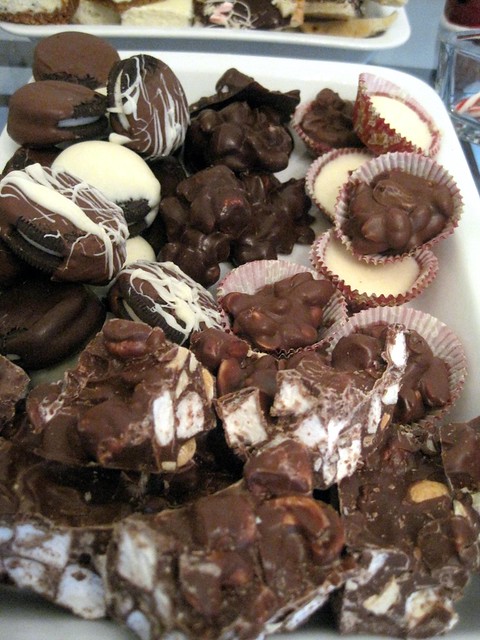
Chocolate Covered Everything


Photo (c) Christina Saull - All Rights Reserved
Reese's Peanut Butter Cup Cheesebake Bars (my personal favorite!)


Photo (c) Christina Saull - All Rights Reserved
Gena's amazing sugar cookies


Photo (c) Christina Saull - All Rights Reserved
Chocolate Peppermint Bark Cookies


Photo (c) Christina Saull - All Rights Reserved
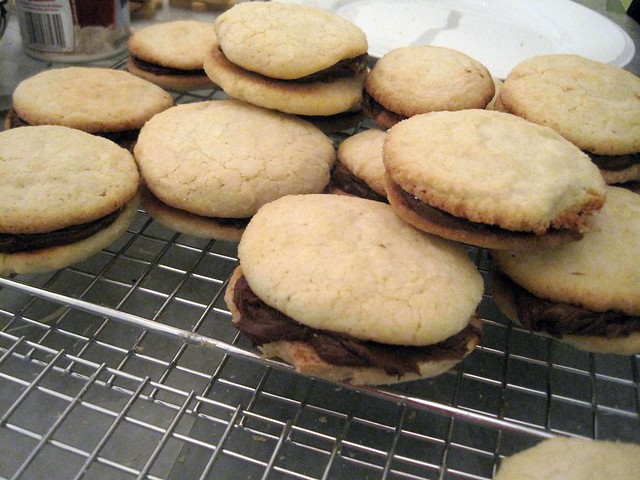
Nutella Sugar Sandwich Cookies

Happy holidays & happy baking everyone! Now off to the gym....

Friday, December 17, 2010

Holiday treats-a-palooza: Nutella Sugar Sandwich Cookies


Photo (C) Christina Saull - All Rights Reserved

These were awesome, even if I did make the cookies a little too big (note: must know the different between teaspoon and tablespoon!).

Oh yeah, & yes, I know 14 tablespoons of butter is a lot. But it's the holidays!

Recipe adapted from America's Test Kitchen via the Cookin' Canuck

Ingredients
2 1/2 cups all-purpose flour
1/2 tsp baking powder
1/2 tsp salt
2 cups sugar, divided
14 tbsp (1 3/4 sticks) unsalted butter
2 large eggs
2 tsp vanilla extract
1 small jar of Nutella (chocolate-hazelnut spread)


Directions
In a medium bowl, whisk together 2 1/2 cups all-purpose flour, 1/2 teaspoon baking powder, and 1/2 teaspoon salt.

In a large bowl, beat 14 tablespoons (1 3/4 sticks) unsalted butter, softened, and 1 1/2 cups granulated sugar with an electric mixer set on medium speed until the mixture is creamy and fluffy, 3 to 5 minutes. Beat in 2 eggs, one at a time, and 2 teaspoons vanilla extract. Turn the mixer to low speed and gradually beat in the flour mixture until it is just combined. Using a rubber spatula, stir the mixture a few times to make sure all of the flour mixture is incorporated.

Place 1/2 cup granulated sugar in a small bowl. With slightly dampened hands, roll 1 teaspoon of the cookie dough between your palms to form a ball. Roll the ball in the sugar to coat it and place it on a prepared baking sheet. Repeat with the remaining dough, spacing the balls about 2 inches apart from each other on the baking sheets.

Lightly coat the bottom of a glass or metal measuring cup with butter and dip into the sugar. Use this to gently flatten the cookies to 3/4-inch thickness.

Bake the cookies, one sheet a time, rotating from front to back halfway through baking. They are done when the edges are set and beginning to brown, 9 to 10 minutes. The centers of the cookies should still be soft and puffy. Remove the cookies from the oven and let them cool on the baking sheet for 10 minutes. Using a spatula, remove the cookies from the baking sheet and let cool on a rack.

Spread the bottom of one cookie with 1 teaspoon Nutella and sandwich with a second cookie.

Serve or store in an airtight container.

Thursday, December 16, 2010

Holiday Treats-a-palooza: Reese's Peanut Butter Cup Cheesecake Bars


Photo (c) Christina Saull - All Rights Reserved

This is perhaps the best thing I made this year. They are SO good. The best part is that you can have a small piece, & they're still satisfying.

Recipe adapted from America's Test Kitchen via the Cookin' Canuck

Ingredients
Crust
7 whole graham crackers, broken into 1-inch pieces
6 tbsp (3/4 stick) unsalted butter (melted)
3 tbsp brown sugar
2 tbsp flour
1/8 tsp salt

Filling
2 (8 oz. each) packages of cream cheese, softened
2/3 cup granulated sugar
2 large eggs
1/4 cup sour cream
1 tsp vanilla extract
12 Reese's peanut butter cups, divided, cut into 6 pieces each

2 oz. bittersweet chocolate, chopped (I used Ghirardelli 60% cocoa chocolate chips)

Directions
Preheat oven to 325 degrees.

Prepare a 8-inch square baking pan by lining the pan with aluminum foil, leaving 3-4 inches of foil draping over the sides of the pan.

The crust:
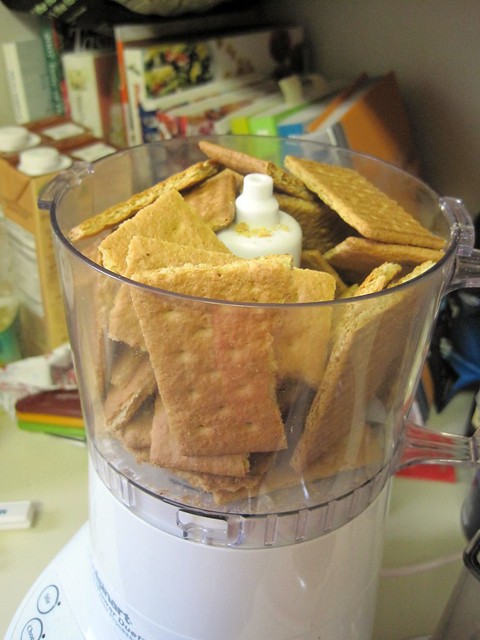
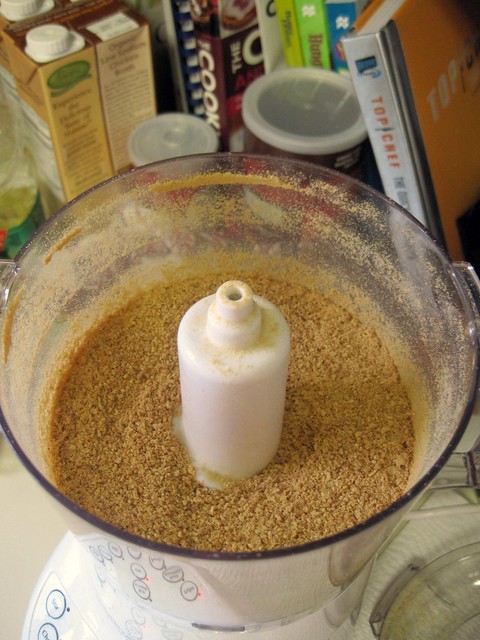
Place graham crackers into the bowl of a food processor (realize you need a bigger food processor) & pulse until the crackers form fine crumbs, about 30 seconds.

Photo (c) Christina Saull - All Rights Reserved


Photo (c) Christina Saull - All Rights Reserved

To the crumbs, add butter, brown sugar, flour, & salt.

Photo (c) Christina Saull - All Rights Reserved

Pulse until the ingredients are fully combined. Using the bottom of a measuring cup or your fingers, press the crumbs into the bottom of the prepared pan.

Photo (c) Christina Saull - All Rights Reserved

Bake until the crust is beginning to brown, 12 to 15 minutes. Let the crust cool on a cooling rack for about 30 minutes.

Photo (c) Christina Saull - All Rights Reserved

The filling:
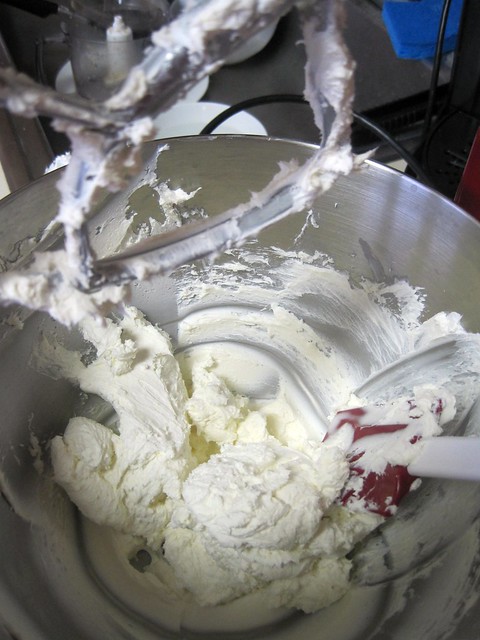
In a large bowl, beat cream cheese until it is very smooth, about 3 minutes. Scrape the beaters & sides of the bowl frequently. You really need an electric hand mixer to do this. A stand mixer just isn't able to be mobile enough to beat it properly

Photo (c) Christina Saull - All Rights Reserved

[possible additional step:
1. realize you don't have an electric hand mixer & that your cream cheese isn't creaming in your stand mixer.

2. turn off oven

3. grab wallet & keys & run down to the car

4. drive to Target

Photo (c) Christina Saull - All Rights Reserved

5. realize half-way there that you took your wedding ring off so it didn't get all yucky baking & you didn't put it back on. Panic when you realize this is your first time in public in three years without a wedding ring on. Press onward anyway, instead of turning around to go home & get it.

Photo (c) Christina Saull - All Rights Reserved

6. run into Target, purchase really nice hand mixer that is super on sale

Photo (c) Christina Saull - All Rights Reserved

7. drive back home]

Gradually beat in granulated sugar until the mixture is combined. Beat in eggs, one at a time, making sure that each is fully incorporated. Beat in sour cream & vanilla extract until fully combined.

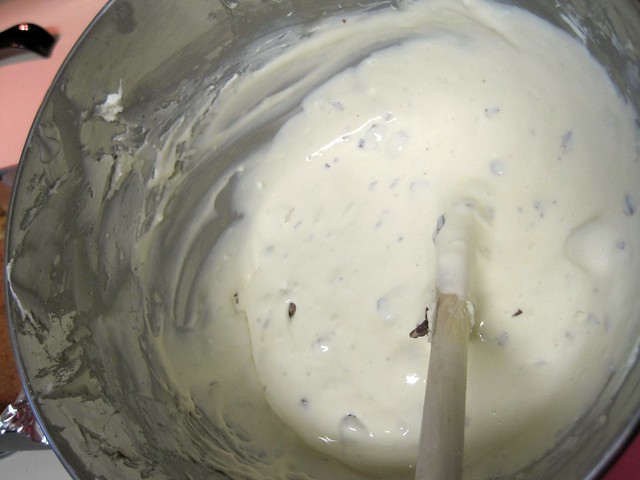
Fold cut up Reese's peanut butter cups into the cream cheese mixture. It's easier to do this with a spatula, not a mixer.

Photo (c) Christina Saull - All Rights Reserved

Scrape the cream cheese mixture into the baking pan, over top of the cooled crust. Spread evenly.

Bake until the edges are set, but the middle still jiggles slightly when the pan is shaken gently, 35 to 40 minutes, rotating the pan halfway through baking.

Place the pan on a cooling rack & allow the bars to cool for 2 hours. Cover with aluminum foil & refrigerate for at least 3 hours, & up to 24 hours.

Using the overhanging foil, lift the bars from the pan. Gently remove the foil & cut into 16 bars.


Place bittersweet chocolate in a small bowl. Microwave on 50% power until melted, stirring every 15 seconds. Drizzle chocolate over the bars, top each with a small chunk of a Reese's peanut butter cup.

Makes 16 bars.

Reese's Peanut Butter Cup Cheesecake Bars

Ingredients
Crust
7 whole graham crackers, broken into 1-inch pieces
6 tbsp (3/4 stick) unsalted butter (melted)
3 tbsp brown sugar
2 tbsp flour
1/8 tsp salt

Filling
2 (8 oz. each) packages of cream cheese, softened
2/3 cup granulated sugar
2 large eggs
1/4 cup sour cream
1 tsp vanilla extract
12 Reese's peanut butter cups, divided, cut into 6 pieces each
2 oz. bittersweet chocolate, chopped (I used Ghirardelli 60% cocoa chocolate chips)

Directions
Preheat oven to 325 degrees. Prepare a 8-inch square baking pan by lining the pan with aluminum foil, leaving 3-4 inches of foil draping over the sides of the pan.

The crust:
Place graham crackers into the bowl of a food processor & pulse until the crackers form fine crumbs, about 30 seconds. To the crumbs, add butter, brown sugar, flour, & salt. Pulse until the ingredients are fully combined. Using the bottom of a measuring cup or your fingers, press the crumbs into the bottom of the prepared pan. Bake until the crust is beginning to brown, 12 to 15 minutes. Let the crust cool on a cooling rack for about 30 minutes.

The filling:
In a large bowl, beat cream cheese until it is very smooth, about 3 minutes. Scrape the beaters & sides of the bowl frequently. Gradually beat in granulated sugar until the mixture is combined. Beat in eggs, one at a time, making sure that each is fully incorporated. Beat in sour cream & vanilla extract until fully combined. Fold cut up Reese's peanut butter cups into the cream cheese mixture. It's easier to do this with a spatula, not a mixer.

Scrape the cream cheese mixture into the baking pan, over top of the cooled crust. Spread evenly. Bake until the edges are set, but the middle still jiggles slightly when the pan is shaken gently, 35 to 40 minutes, rotating the pan halfway through baking.

Place the pan on a cooling rack & allow the bars to cool for 2 hours. Cover with aluminum foil & refrigerate for at least 3 hours, & up to 24 hours. Using the overhanging foil, lift the bars from the pan. Gently remove the foil & cut into 16 bars.

Place bittersweet chocolate in a small bowl. Microwave on 50% power until melted, stirring every 15 seconds. Drizzle chocolate over the bars, top each with a small chunk of a Reese's peanut butter cup.

Makes 16 bars.

Previous treats-a-palooza:
Monday:
chocolate covered everything
Tuesday: Gena's rockin' sugar cookies
Wednesday:
a new spin on chocolate peppermint bark

Wednesday, December 15, 2010

Holiday Treats-a-palooza: Chocolate & Peppermint Bark Cookies


Photo (c) Christina Saull - All Rights Reserved

These are a great spin on traditional chocolate peppermint bark!

Recipe adapted from America's Test Kitchen via the Cookin' Canuck

Ingredients
2 cups all-purpose flour
1/4 tsp salt
1 cup (2 sticks) unsalted butter, room temperature
1 cup sugar
1 tsp pure vanilla extract
1 large egg yolk
6 oz. bittersweet or semisweet chocolate, chopped
2 oz. high-quality white chocolate
1/2 cup finely chopped red & white candies or candy canes (about 3 ounces)
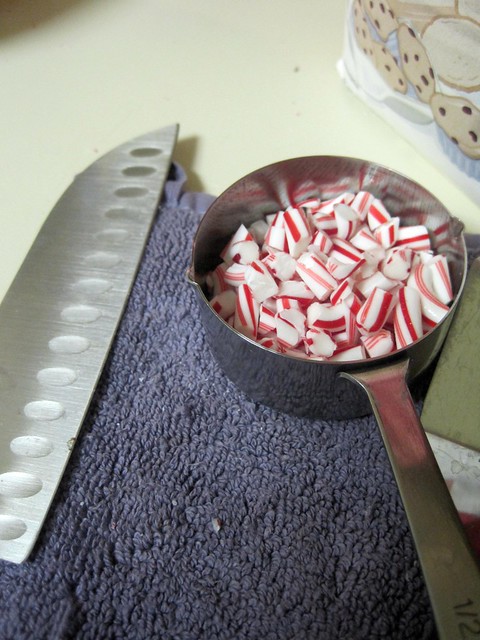
Photo (c) Christina Saull - All Rights Reserved

Directions
Preheat oven to 350 degrees F. Spray a 13x9x2-inch baking pan with cooking spray and line the bottom of the pan with parchment, letting it hang over the sides of the pan.

In a medium bowl, whisk together all-purpose flour and salt. Set aside.

Photo (c) Christina Saull - All Rights Reserved

In the bowl of a mixer, beat butter until creamy, about 2 minutes.
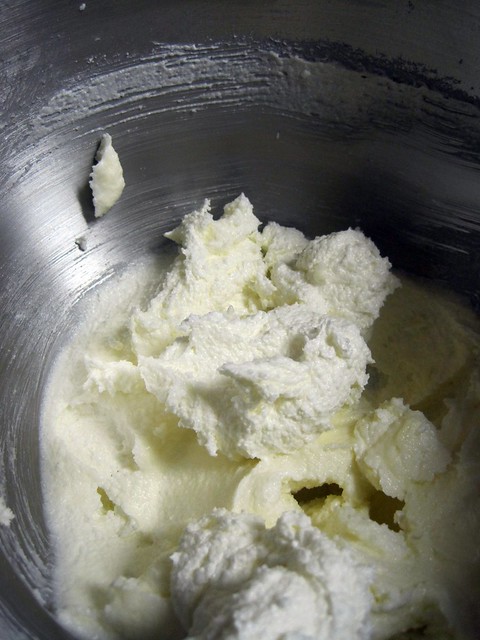
Photo (c) Christina Saull - All Rights Reserved

Gradually beat in sugar. Continue to beat for an additional 3 minutes, until the mixture is light and creamy. Scrape the sides of the bowl as needed. Beat in vanilla extract and egg yolk. Turn the mixer to low speed and gradually beat in the flour mixture, until just combined. Do not overmix.

Scatter the dough over the bottom of the prepared pan and gently press it, with slightly moistened fingers, to form a flat layer. Prick all over with a fork.

Bake the cookie layer until golden brown and slightly puffed, and edges are beginning to pull away from the sides of the pan, 25-30 minutes.

Place on a cookie rack and immediately sprinkle chopped bittersweet or semisweet (or a combination of the two) over the cookie layer. Let the chocolate sit for about 3 minutes. Using an offset spatula, spread the chocolate into an even layer over the surface of the cookies. Immediately sprinkle 3 ounces crushed red and white peppermint candies, or candy canes, over the chocolate layer.
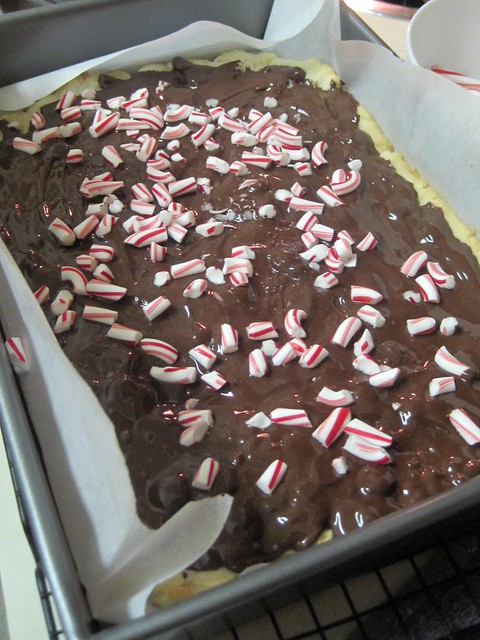
Photo (c) Christina Saull - All Rights Reserved

Place chopped white chocolate in a medium metal bowl set over a simmering pot of water. Stir constantly until the chocolate is melted and smooth. Using a fork, drizzle the white chocolate over the peppermint candies. Chill for approximately 30 minutes.

Gripping the overhanging parchment paper, lift the cookies out of the pan and place on a work surface. Using a large, sharp knife, cut the cookies into irregular pieces. This can be stored in an airtight container in a refrigerator for one week.

Chocolate & Peppermint Bark Cookies
Ingredients
2 cups all-purpose flour
1/4 tsp salt
1 cup (2 sticks) unsalted butter, room temperature
1 cup sugar
1 tsp pure vanilla extract
1 large egg yolk
6 oz. bittersweet or semisweet chocolate, chopped
2 oz. high-quality white chocolate
1/2 cup finely chopped red & white candies or candy canes (about 3 ounces)

Directions
Preheat oven to 350 degrees F. Spray a 13x9x2-inch baking pan with cooking spray and line the bottom of the pan with parchment, letting it hang over the sides of the pan.

In a medium bowl, whisk together all-purpose flour and salt. Set aside.

In the bowl of a mixer, beat butter until creamy, about 2 minutes.
Gradually beat in sugar. Continue to beat for an additional 3 minutes, until the mixture is light and creamy. Scrape the sides of the bowl as needed. Beat in vanilla extract and egg yolk. Turn the mixer to low speed and gradually beat in the flour mixture, until just combined. Do not overmix.

Scatter the dough over the bottom of the prepared pan and gently press it, with slightly moistened fingers, to form a flat layer. Prick all over with a fork.

Bake the cookie layer until golden brown and slightly puffed, and edges are beginning to pull away from the sides of the pan, 25-30 minutes.

Place on a cookie rack and immediately sprinkle chopped bittersweet or semisweet (or a combination of the two) over the cookie layer. Let the chocolate sit for about 3 minutes. Using an offset spatula, spread the chocolate into an even layer over the surface of the cookies. Immediately sprinkle 3 ounces crushed red and white peppermint candies, or candy canes, over the chocolate layer.

Place chopped white chocolate in a medium metal bowl set over a simmering pot of water. Stir constantly until the chocolate is melted and smooth. Using a fork, drizzle the white chocolate over the peppermint candies. Chill for approximately 30 minutes.

Gripping the overhanging parchment paper, lift the cookies out of the pan and place on a work surface. Using a large, sharp knife, cut the cookies into irregular pieces. This can be stored in an airtight container in a refrigerator for one week.

Previous treats-a-palooza:
Monday - chocolate covered everything
Tuesday
- Gena's sugar cookies

Tuesday, December 14, 2010

Holiday Treats-a-palooza: Gena's Sugar Cookies


Photo (c) Christina Saull - All Rights Reserved

These amazing sugar cookies come from a recipe from one of my best friends, Gena. She adapted the recipe from one her grandmother taught her, which originally called for the use of lard. See, you don't feel so bad about using butter & Crisco now, do you?

Gena is an amazing baker, so I'm glad to be able to share this recipe with all of you!

Ingredients
2 1/2 cups flour
1 1/2 cups sugar
1/2 cup butter-flavored Crisco
1 egg
1 tsp vanilla
1/2 cup butter (melted)
2 tbsp milk

Directions
Pre-heat oven at 350 degrees.

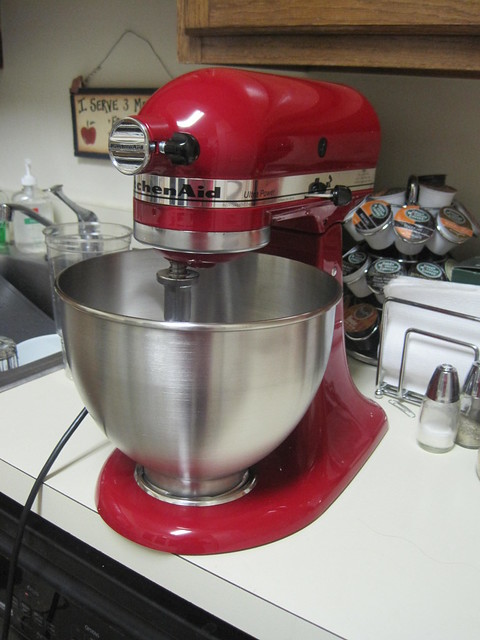
Pull out one of these (a hand mixer would also work):

Photo (c) Christina Saull - All Rights Reserved

Ingredients
2 1/2 cups flour
1 1/2 cups sugar
1/2 cup butter-flavored Crisco
1 egg
1 tsp vanilla
1/2 cup butter (melted)
2 tbsp milk

Directions
Pre-heat oven at 350 degrees.

Pull out one of these (a hand mixer would also work):

Photo (c) Christina Saull - All Rights Reserved

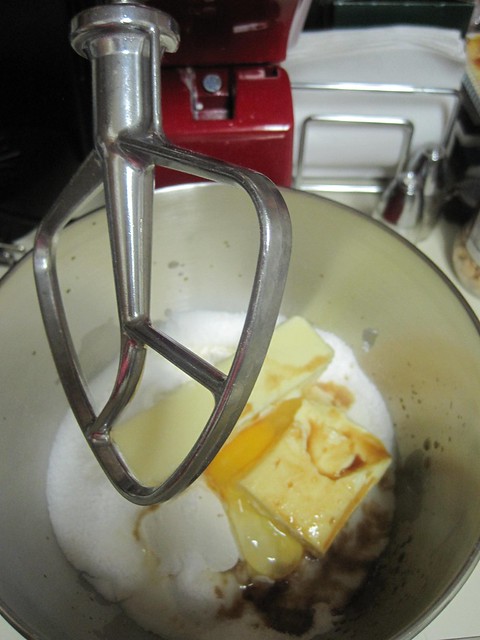
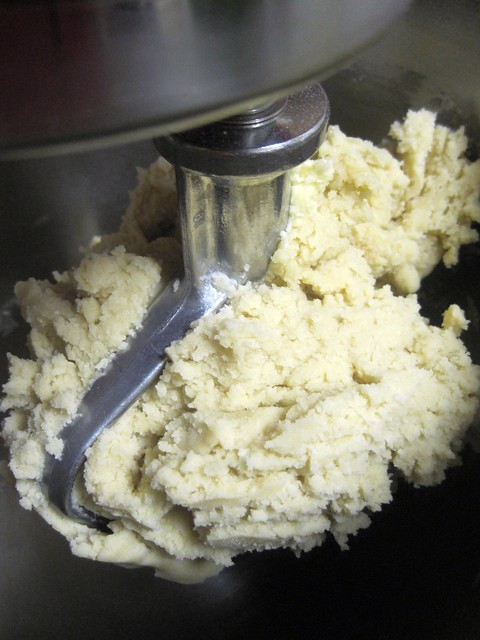
Blend all ingredients in mixer until they form a ball.

Photo (c) Christina Saull - All Rights Reserved

Turn ball on floured surface & knead lightly.

Roll out dough on floured surface & cut cookies with cookie cutters.
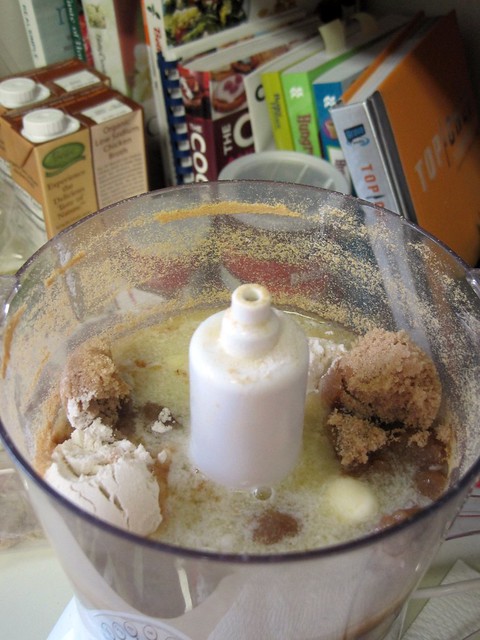
Photo (c) Christina Saull - All Rights Reserved


Photo (c) Christina Saull - All Rights Reserved


Photo (c) Christina Saull - All Rights Reserved

Bake 8-10 minutes until edges are slightly browned.

Photo (c) Christina Saull - All Rights Reserved

Frost with icing (if desired). A major icing shout out to Brad, who iced the amazing cookies above. All 55 of them (minus the two I broke while attempting to ice).

Gena's Sugar Cookies

Ingredients
2 1/2 cups flour
1 1/2 cups sugar
1/2 cup butter-flavored Crisco
1 egg
1 tsp vanilla
1/2 cup butter (melted)
2 tbsp milk

Directions
Pre-heat oven at 350 degrees.

In a large bowl, combine all ingredients. Blend all ingredients using a stand mixer, hand mixer or elbow grease until they form a ball.

Turn ball on floured surface & knead lightly.

Roll out dough on floured surface & cut cookies with cookie cutters.
Bake 8-10 minutes until edges are slightly browned.
Frost with icing (if desired)

Previous treats-a-palooza:
Monday: chocolate covered everything